Ah, Valentine’s Day! It’s that special time of year when love is in the air and your kitchen can turn into a little chocolate factory. There’s just something so delightful about making homemade treats, especially when it comes to *valentines chocolate*. The rich aroma of melting chocolate, the sweet anticipation of sharing your creations—it just warms my heart! I remember the first time I decided to make chocolates for someone special. I was nervous but excited, and let me tell you, the smile on their face was worth every melted drop of chocolate.
Making these little bites of joy is not only easy, but it’s also a fantastic way to show someone you care. You get to choose the flavors, the shapes, and even the decorations! Trust me, there’s nothing quite like the satisfaction of handing over a box of chocolates that you crafted yourself, knowing all the love that went into each piece. So, grab your apron, and let’s dive into the delicious world of homemade chocolates that are sure to impress this Valentine’s Day!
Ingredients List
To whip up these delightful homemade chocolates, you’ll need just a handful of simple ingredients. Here’s what you’ll need:
- 1 cup dark chocolate chips: Use high-quality dark chocolate chips for a rich flavor. Choose chips that are at least 60% cocoa for that deep chocolatey goodness.
- 1/2 cup heavy cream: This will add creaminess and help create that smooth texture. Make sure it’s fresh for the best results!
- 1 teaspoon vanilla extract: A splash of vanilla enhances the chocolate’s flavor. Always go for pure vanilla extract if you can—it makes a world of difference!
- 1/4 cup powdered sugar: This adds just the right amount of sweetness. Sift it first to avoid any lumps in your chocolate mixture.
- Pinch of salt: A little salt elevates the chocolate flavor. Just a tiny pinch is all you need to balance the sweetness!
With these ingredients on hand, you’re ready to create some amazing chocolates that are sure to impress your loved ones. Let’s get started!
How to Prepare Instructions
Now that you’ve got your ingredients ready, let’s dive into the step-by-step process of making these delicious homemade chocolates! Don’t worry; it’s easier than it sounds. Just follow these simple instructions, and you’ll be on your way to impressing your loved ones in no time!
Step 1: Melt the Chocolate
The first step is melting those beautiful dark chocolate chips. Grab a microwave-safe bowl and add your 1 cup of chocolate chips. Set your microwave to medium power (about 50% power) and heat the chocolate in 30-second intervals. After each interval, give it a good stir. This should take about 1 to 2 minutes total, depending on your microwave. You want the chocolate to be just melted, not too hot. If there are still a few lumps, let it sit for a minute and stir again. Trust me, this gentle approach keeps the chocolate from burning!
Step 2: Heat the Cream
Next up, it’s time to heat the heavy cream. Pour your 1/2 cup of heavy cream into a saucepan and place it over medium heat. Keep an eye on it, as you want to heat it until it just simmers, not boil. You’ll see tiny bubbles forming around the edges of the pan—that’s your cue! This usually takes about 3-5 minutes. The hot cream is going to create that luscious, velvety texture in your chocolate, so don’t skip this step!
Step 3: Combine Ingredients
Once your cream is ready, carefully pour it over the melted chocolate. This is where the magic happens! Add your 1 teaspoon of vanilla extract, 1/4 cup of sifted powdered sugar, and a pinch of salt right into the bowl. Now, the key here is to stir it all together until it’s completely smooth and well-combined. I like to use a spatula to scrape the sides and bottom of the bowl to ensure everything mixes in perfectly. You’ll end up with a glossy, chocolatey mixture that’s just begging to be poured into molds!
Step 4: Molding the Chocolate
Now, grab your chocolate molds! Carefully pour the chocolate mixture into the molds of your choice. I find using a spoon or a small pitcher helps avoid any mess. If you’re feeling adventurous, you can sprinkle some nuts or dried fruit into the molds before pouring in the chocolate for added texture! Just give the molds a gentle tap on the counter to release any air bubbles. This step ensures your chocolates have a beautiful shape.
Step 5: Refrigeration
Time to let your chocolates set! Place the filled molds in the refrigerator and let them chill for about 1 to 2 hours. During this time, the chocolate will harden beautifully. You’ll know they’re ready when they feel firm to the touch. It’s so exciting to think about the delicious treats you’ll soon enjoy!
Step 6: Serving the Chocolates
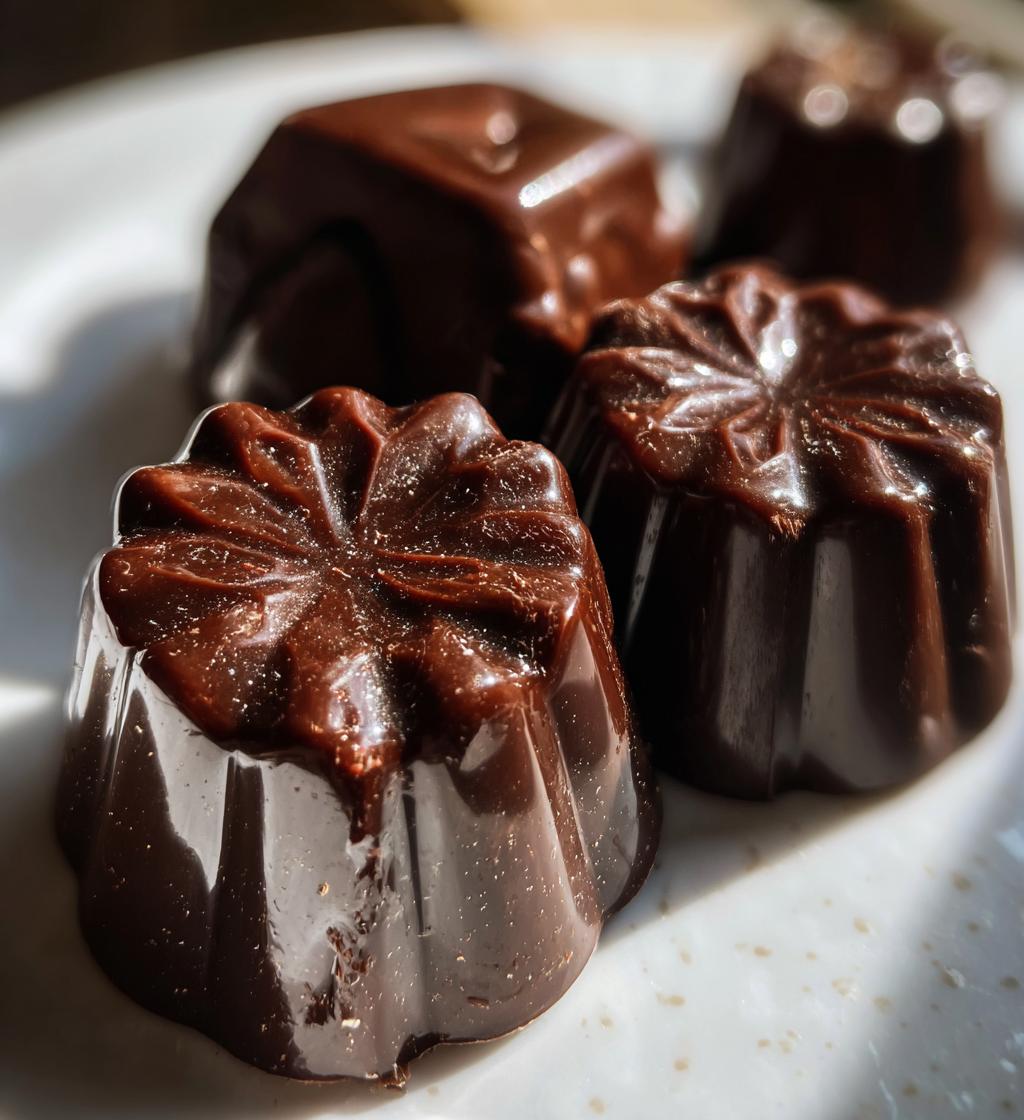
Once your chocolates are set, it’s time for the fun part—removing them from the molds! Gently press on the back of each mold to pop the chocolates out. If they’re stubborn, a little twist can help. For presentation, consider placing your chocolates in a cute box or on a decorative plate. You can even add a sprinkle of sea salt on top for that gourmet touch! Trust me, your loved ones will be so impressed when they see (and taste) your homemade creations!
Why You’ll Love This Recipe
There’s so much to adore about these homemade chocolates! Here are just a few reasons why this recipe will become a go-to for your Valentine’s Day celebrations:
- Quick Preparation: With just 15 minutes of prep time, you can whip up a batch of these delicious chocolates in no time, leaving you plenty of moments to enjoy with your loved ones!
- No Baking Required: This is a no-bake recipe, so you don’t have to worry about complicated baking techniques or waiting for an oven to preheat. Just melt, mix, and chill!
- Customizable Treats: You can personalize these chocolates to fit any palate! Add your favorite nuts, dried fruits, or even a splash of flavored extracts—get creative!
- Charming Presentation: These chocolates are not just tasty; they look gorgeous too! Whether in cute molds or beautifully packaged, they make perfect gifts for your loved ones.
- Made with Love: There’s something truly special about giving homemade gifts. Trust me, the effort you put into making these chocolates will be appreciated far beyond the taste!
So, roll up your sleeves and get ready to impress your Valentine with these delightful chocolates that are sure to win hearts!
Tips for Success
To make sure your homemade chocolates turn out perfectly, I’ve got some pro tips that’ll help you avoid common pitfalls and get the best results. Trust me, these little gems are worth the effort!
- Use Quality Chocolate: The chocolate you choose makes a huge difference in flavor. Go for high-quality dark chocolate chips that you enjoy eating on their own. You’ll taste the difference in your finished chocolates!
- Be Patient When Melting: When melting the chocolate, don’t rush it. Using medium power in 30-second increments and stirring in between is key to preventing burning. If it seems a bit thick after melting, let it sit for a minute before stirring again to get that silky smooth texture.
- Don’t Overheat the Cream: When heating the heavy cream, keep a close eye on it. You want it to simmer gently, not boil. If it boils, it can affect the chocolate mixture, so watch those bubbles carefully!
- Mix Thoroughly: When combining the melted chocolate and cream, ensure you stir until everything is completely smooth. This step is crucial for achieving that luscious texture. Take your time here; it really pays off!
- Tap the Molds: After pouring the chocolate into molds, give them a gentle tap on the counter to release any trapped air bubbles. This simple trick helps your chocolates have a perfect finish and prevents unsightly holes.
- Allow Enough Time to Set: Patience is key when it comes to refrigeration. Make sure to let the chocolates chill for at least 1 to 2 hours. If you’re in a hurry, don’t rush this step—undercooked chocolates can end up mushy!
- Warm Molds for Easy Release: If your chocolates are sticking to the molds, you can place them in the fridge for a few minutes to firm up. Alternatively, warming the outside of the mold slightly with your hands can help them pop out more easily.
With these tips in your back pocket, you’ll be well on your way to creating delicious and beautiful chocolates that will impress everyone this Valentine’s Day. Happy chocolate making!
Variations
One of the best things about homemade chocolates is how versatile they can be! You can easily switch things up to match your taste or to surprise your loved ones with something new. Here are some fun variations to consider:
- Different Molds: Get creative with your molds! Instead of standard chocolate shapes, try using heart-shaped molds for Valentine’s Day, or even fun animal shapes for kids. Silicone molds are especially great because they make it easy to pop the chocolates out once they’re set.
- Flavor Infusions: Add a twist to your chocolates by infusing different flavors. Consider incorporating a few drops of peppermint extract for a refreshing touch, or a splash of orange or raspberry extract for a fruity burst. Just remember to start with a small amount and taste as you go!
- Adding Nuts or Dried Fruits: For a delightful crunch or chew, mix in some chopped nuts like almonds, walnuts, or hazelnuts. Dried fruits like cranberries or cherries can add a lovely sweetness and chewiness that balances the rich chocolate.
- Swirl in Some White Chocolate: For a striking visual effect, melt some white chocolate and drizzle it over the dark chocolate mixture before it sets. You can even use a toothpick to create beautiful swirls that make your chocolates look extra special.
- Layered Chocolates: If you’re feeling ambitious, why not create layered chocolates? Pour a layer of your chocolate mixture into the molds and let it set slightly before adding a different flavor or color on top. This method can create stunning and delicious combinations!
- Spicy Kick: For those who enjoy a hint of heat, add a pinch of cayenne pepper or a dash of chili powder to your chocolate mixture. It adds an unexpected kick that contrasts beautifully with the sweetness of the chocolate.
These variations not only make your chocolates unique but also give you a chance to express your creativity in the kitchen. So, don’t hesitate to mix and match these ideas to craft something truly special for your Valentine’s Day celebration!
Storage & Reheating Instructions
Once you’ve created these delightful homemade chocolates, you’ll want to make sure they stay fresh and delicious for as long as possible. Proper storage is key to maintaining their wonderful flavor and texture!
To store your chocolates, place them in an airtight container. I like to layer them between sheets of parchment paper to prevent any sticking. Keep the container in a cool, dry place away from direct sunlight—your pantry or a cool cupboard is ideal. If you live in a warmer climate, it’s best to store them in the refrigerator to prevent melting. Just be aware that refrigeration can sometimes cause chocolates to develop a bit of condensation when taken out, so let them sit at room temperature for a few minutes before serving.
If you have leftover chocolates and want to enjoy them later, they can typically last for about 2-3 weeks when stored properly. Just make sure to check for any signs of spoilage before indulging!
Now, if you ever find yourself with chocolates that have hardened a bit too much, don’t worry! You can gently reheat them to soften them up again. Place the chocolates in a microwave-safe bowl and heat them at medium power in short bursts of 10-15 seconds. Stir in between intervals until they reach your desired softness. But be careful—overheating can cause the chocolate to seize or become grainy, so keep a close eye on it.
With these simple storage tips, your homemade chocolates will stay as delicious as the day you made them, ready to bring smiles to your loved ones’ faces whenever the craving strikes!
Nutritional Information Section
When you indulge in these delightful homemade chocolates, it’s always good to know what you’re treating yourself to! Here’s the estimated nutritional information for one chocolate piece:
- Calories: 120
- Fat: 8g
- Saturated Fat: 5g
- Unsaturated Fat: 3g
- Trans Fat: 0g
- Cholesterol: 10mg
- Sodium: 5mg
- Carbohydrates: 12g
- Fiber: 2g
- Sugar: 10g
- Protein: 1g
Keep in mind that these values are estimates and can vary based on the specific brands of ingredients you use and any variations you might add to the recipe. So, if you decide to sprinkle in some nuts or dried fruits, don’t forget to factor those in! Enjoy your delicious chocolates, knowing they’re a sweet treat made with love!
FAQ Section
Q1. Can I use milk chocolate instead of dark chocolate for these chocolates?
Absolutely! While I love the rich flavor of dark chocolate, you can definitely use milk chocolate if that’s what you prefer. Just keep in mind that the sweetness level will be higher, so you might want to adjust the amount of powdered sugar accordingly.
Q2. How long do these homemade chocolates last?
When stored properly in an airtight container, these homemade chocolates can last about 2-3 weeks. Just make sure to keep them in a cool, dry place to maintain their deliciousness!
Q3. Can I make these chocolates in advance for Valentine’s Day?
Yes, you can! In fact, making them a few days ahead of time is a great idea. Just be sure to store them correctly, and they’ll be just as delightful when it’s time to share them with your loved ones.
Q4. What if I don’t have chocolate molds?
No worries at all! You can use any small silicone or plastic container to shape your chocolates. Alternatively, you can pour the mixture into a parchment-lined baking dish and cut them into squares once set. They’ll still taste amazing!
Q5. How can I make my chocolates more festive for Valentine’s Day?
There are so many fun ways to dress up your chocolates! You can drizzle some white chocolate on top, sprinkle with colorful sprinkles, or even add heart-shaped decorations. Get creative and make them as special as your loved ones!

valentines chocolate: 5 Irresistible Treats to Impress Love
- Total Time: 25 minutes
- Yield: 12 chocolates 1x
- Diet: Vegetarian
Description
Delicious homemade chocolate treats perfect for Valentine’s Day.
Ingredients
- 1 cup dark chocolate chips
- 1/2 cup heavy cream
- 1 teaspoon vanilla extract
- 1/4 cup powdered sugar
- Pinch of salt
Instructions
- Melt the chocolate chips in a microwave-safe bowl.
- In a saucepan, heat the heavy cream until it just simmers.
- Pour the hot cream over the melted chocolate.
- Add vanilla extract, powdered sugar, and salt.
- Stir until smooth and well combined.
- Pour the mixture into molds and refrigerate until set.
- Remove from molds and serve.
Notes
- Use different molds for fun shapes.
- Store chocolates in a cool place.
- Consider adding nuts or dried fruits for variety.
- Prep Time: 15 minutes
- Cook Time: 10 minutes
- Category: Dessert
- Method: No-bake
- Cuisine: American
Nutrition
- Serving Size: 1 chocolate
- Calories: 120
- Sugar: 10g
- Sodium: 5mg
- Fat: 8g
- Saturated Fat: 5g
- Unsaturated Fat: 3g
- Trans Fat: 0g
- Carbohydrates: 12g
- Fiber: 2g
- Protein: 1g
- Cholesterol: 10mg
Keywords: valentines chocolate, homemade chocolate, chocolate treats