Mini Loaf Pan Desserts: 5 Irresistible Recipes for Sharing
Are you looking for a delightful way to enjoy desserts without the guilt? Mini loaf pan desserts offer a perfect solution! These charming little treats not only save time but also allow you to indulge in your favorite flavors while keeping portion control in check. Have you ever found yourself craving a sweet treat but worried about overindulging? Mini loaf pan desserts are the answer to your dilemma. Imagine the warm aroma of freshly baked goods wafting through your kitchen, inviting you to take a bite. The golden crust, soft and tender inside, and the sweet flavors combine to create an unforgettable experience.
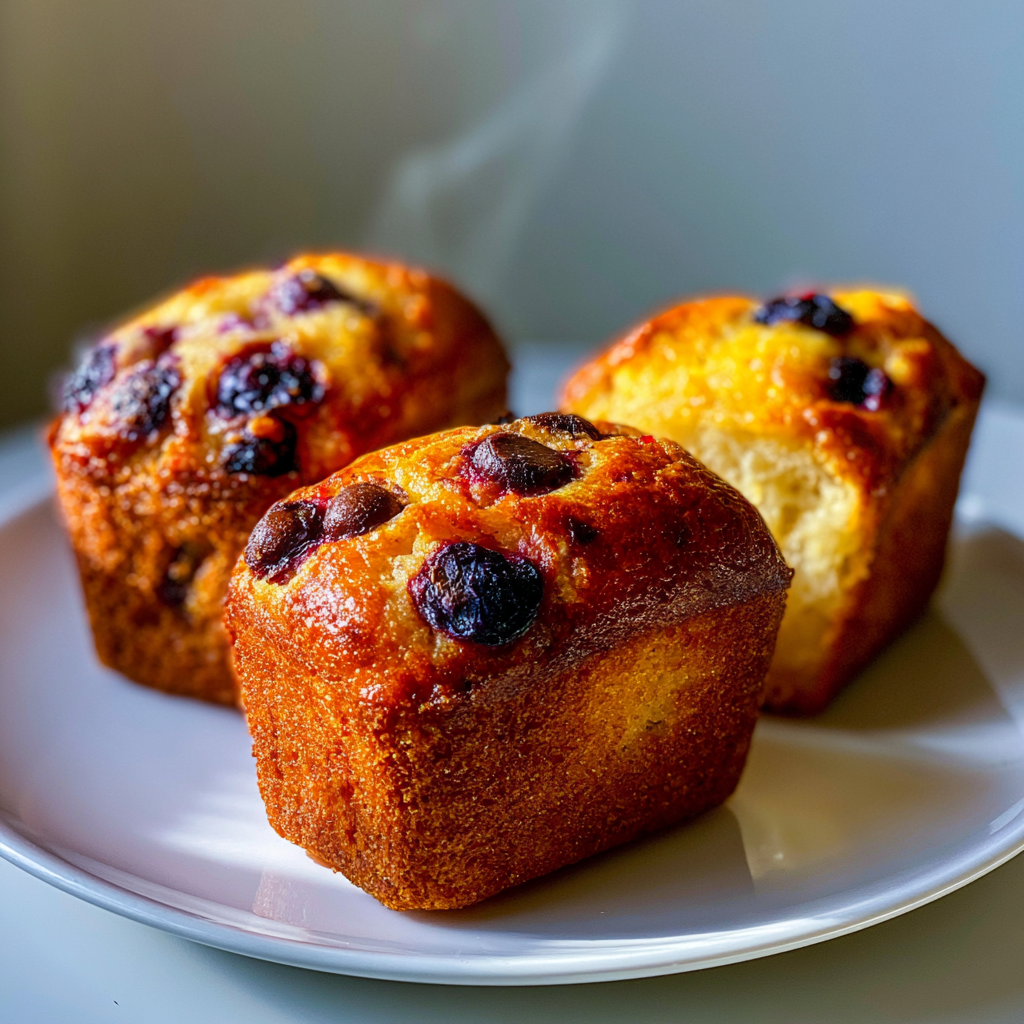
With the right ingredients and a few simple steps, you can create mini loaf desserts that are visually appealing and incredibly satisfying. Whether you’re hosting a gathering, looking for a unique gift, or simply treating yourself, these mini treats are sure to impress. The vibrant colors of fruits or the rich dark chocolate chips sprinkled throughout the batter not only please the eye but also create a delightful contrast in flavors. Each slice reveals a tender crumb that melts in your mouth, making every bite a moment to savor.
Moreover, mini loaf pan desserts are versatile! You can easily customize them with various flavors, fillings, and toppings. Whether you prefer fruity, chocolatey, or nutty flavors, there’s a mini loaf recipe for you. As a result, these desserts are perfect for any occasion, from weeknight dinners to holiday celebrations. Let’s dive into the health benefits of some key ingredients used in these delightful mini loaf desserts.
First, all-purpose flour serves as the foundation for our mini loaf creations. It is rich in carbohydrates, providing you with energy to power through your day. Additionally, granulated sugar, while often viewed as a guilty pleasure, can enhance your mood by releasing serotonin in your brain when consumed in moderation. You’ll also find baking powder among the ingredients, which not only helps our desserts rise but also adds a small amount of calcium and iron to your diet.
Furthermore, unsalted butter is a key player in achieving that rich, satisfying flavor and texture in your mini loaf desserts. It contains Vitamin A, which is essential for vision and immune function. If you opt for milk in your recipes, you’ll enjoy the benefits of calcium and protein, both vital for strong bones and muscle function. Vanilla extract adds a unique aroma and flavor, providing antioxidants and potential health benefits.
Lastly, let’s not forget about the optional ingredients like chocolate chips or fruits. Dark chocolate chips are packed with antioxidants, specifically flavonoids, which can improve heart health. On the other hand, fruits like bananas or berries are excellent sources of vitamins, minerals, and dietary fiber that aid digestion and overall health. Did you know that incorporating fruits into your desserts can significantly boost their nutritional value?
This specific version of mini loaf pan desserts stands out due to its focus on portion control and variety. Unlike traditional cakes, which can lead to overindulgence, these mini loaves offer just the right amount of sweetness. The unique baking technique allows for even cooking and a delightful crust while keeping the inside moist and tender. Best of all, these recipes are user-friendly, making them perfect for families, beginners, or anyone looking to impress guests at a gathering.
Quickly, let’s summarize what you can expect from these mini loaf pan desserts. Each recipe will have a prep time of around 15-20 minutes and a cooking time of 30-40 minutes, making them ideal for busy weeknights or meal prep. They serve about 6-8 people, depending on how generous you are with your slices. Plus, they cater to all skill levels, so you can confidently tackle these delicious desserts.
What is Mini Loaf Pan Desserts
Mini loaf pan desserts are bite-sized sweet treats baked in individual-sized loaf pans. These desserts provide a controlled portion while satisfying your sweet tooth. They can be made with various ingredients, flavors, and textures, making them versatile for any occasion.
Why You Will Love This Recipe
- Perfect portion control for guilt-free indulgence.
- Quick and easy to prepare, ideal for busy schedules.
- Customizable with various flavors, fruits, or chocolates.
- Great for sharing at gatherings or as thoughtful gifts.
- Appealing presentation that impresses guests.
Ingredients You Need
- All-purpose flour: The base of the dessert that provides structure.
- Granulated sugar: Adds sweetness and enhances flavor.
- Baking powder: Helps the loaves rise and achieve a fluffy texture.
- Salt: Balances sweetness and enhances flavor.
- Unsalted butter: Adds richness and moisture.
- Milk: Contributes to the tenderness and flavor.
- Vanilla extract: Provides a warm, inviting aroma.
- Eggs: Binds ingredients and adds moisture.
- Chocolate chips or fruit (optional): Adds flavor and texture variations.
How to Make Mini Loaf Pan Desserts Step by Step
- Preheat your oven to 350°F (175°C). Grease your mini loaf pans with butter or cooking spray.
- In a large mixing bowl, combine all-purpose flour, granulated sugar, baking powder, and salt. Mix well.
- In a separate bowl, cream together unsalted butter and granulated sugar until light and fluffy.
- Add in the eggs, milk, and vanilla extract, mixing until combined.
- Gradually add the dry ingredients to the wet mixture, stirring until just combined. Be careful not to overmix.
- If using, fold in chocolate chips or chopped fruit at this stage.
- Divide the batter evenly among the prepared mini loaf pans, filling each about 2/3 full.
- Bake for 30-40 minutes or until a toothpick inserted into the center comes out clean.
- Allow the mini loaves to cool in the pans for 10 minutes, then transfer to a wire rack to cool completely.
Pro Tip: Use parchment paper in your mini loaf pans for easy removal.
Pro Tip: For a more intense flavor, use mini chocolate chips!
Expert Tips for Best Results
- Ensure all your ingredients are at room temperature for even mixing.
- Do not overmix the batter to prevent dense mini loaves.
- Experiment with different extracts like almond or lemon for unique flavors.
- Use a kitchen scale for precise measurements, especially for flour.
- Store any leftovers in an airtight container to maintain freshness.
- Consider adding a glaze or frosting for an extra layer of sweetness.
Variations and Substitutions
- Gluten-free option: Substitute all-purpose flour with a 1:1 gluten-free flour blend.
- Dairy-free: Use coconut oil and almond milk instead of butter and regular milk.
- Low-carb: Replace sugar with a low-calorie sweetener like erythritol.
- Seasonal: Incorporate pumpkin puree for a fall-inspired mini loaf.
How to Serve and Store
Serve your mini loaf desserts warm or at room temperature, with a dusting of powdered sugar or a dollop of whipped cream for an elegant touch. Store any leftovers in the fridge for up to 5 days, ensuring they are in an airtight container. You can freeze these mini loaves for up to 3 months; just wrap them tightly in plastic wrap and foil. To reheat, simply place them in a microwave for a few seconds or in an oven at 350°F (175°C) for about 10 minutes.
Frequently Asked Questions
Can I use a regular loaf pan instead of a mini loaf pan?
Yes, but the baking time will vary. A regular loaf will take longer to cook through.
How do I know when my mini loaves are done baking?
Insert a toothpick into the center; it should come out clean or with a few crumbs attached.
Can I add nuts to my mini loaf desserts?
Absolutely! Chopped nuts can add a delightful crunch and flavor to your loaves.
What is the best way to store mini loaf desserts?
Store them in an airtight container at room temperature for up to 3 days or refrigerate for up to a week.
Can I make these mini loaves vegan?
Yes, substitute eggs with flaxseed meal or applesauce and use plant-based milk and butter.
How can I make these mini loaves more festive?
Add seasonal spices like cinnamon or nutmeg, or use colored sprinkles for a fun touch.
In conclusion, mini loaf pan desserts are a delightful way to enjoy sweet treats while maintaining portion control. With their rich flavor and versatility, they are perfect for any occasion. Enjoy the health benefits of key ingredients while indulging in a charming dessert. Try this recipe today and leave a comment below!
Print
Mini Loaf Pan Desserts: 5 Irresistible Recipes for Sharing
Description
Delicious and easy-to-make desserts baked in mini loaf pans, perfect for portion control and sharing.
Ingredients
- 2 cups all-purpose flour
- 1 cup granulated sugar
- 2 teaspoons baking powder
- 1/2 teaspoon salt
- 1/2 cup unsalted butter
- 1 cup milk
- 1 teaspoon vanilla extract
- 2 eggs
- 1 cup chocolate chips or fruit (optional)
Instructions
- Preheat the oven to 350°F (175°C).
- Grease or line mini loaf pans with parchment paper.
- In a large mixing bowl, whisk together the flour, sugar, baking powder, and salt.
- In another bowl, combine melted butter, milk, vanilla extract, and eggs. Mix until well combined.
- Pour the wet ingredients into the dry ingredients and stir until just combined. Do not overmix.
- Fold in chocolate chips or fruit if using.
- Divide the batter evenly among the mini loaf pans, filling each about 2/3 full.
- Bake for 20-25 minutes or until a toothpick inserted into the center comes out clean.
- Allow to cool in the pans for 10 minutes before transferring to a wire rack to cool completely.
Notes
- You can use different flavor extracts (like almond or lemon) to customize the flavor.
- For added texture, consider sprinkling nuts or seeds on top before baking.
- Store in an airtight container at room temperature for up to 3 days.
Keywords: mini loaf pan desserts, easy mini loaf recipes, baked desserts, portion control desserts, chocolate mini loaves, fruit mini loaves