Kitchen Craft · Homemade Snacks
The Art of the Perfect Homemade Potato Chip
A deep dive into technique, science, and seasoning — everything you need to make chips that shatter beautifully
7 Steps2 PotatoesServes 2–3Cheese & Paprika
The Story
Why Make Your Own Chips?
There is a certain magic in the moment a homemade potato chip shatters between your teeth — a crispness so precise, so deeply satisfying, that no bag from a supermarket shelf can replicate it.
Store-bought chips have their place, but they are a compromise — engineered for shelf life, mass production, and consistent mediocrity. They are designed to survive warehouses, delivery trucks, and months of sitting beneath fluorescent lights. Homemade chips, by contrast, are designed for one thing only: to be eaten immediately, while they are at their absolute peak of perfection.
This recipe is not complicated. It uses just two medium potatoes, a handful of pantry staples, and a technique that has been refined to produce chips so crispy they practically ring when you tap them. The secret lies not in any exotic ingredient, but in understanding why each step works — because when you understand the science, you never undershoot or overshoot.
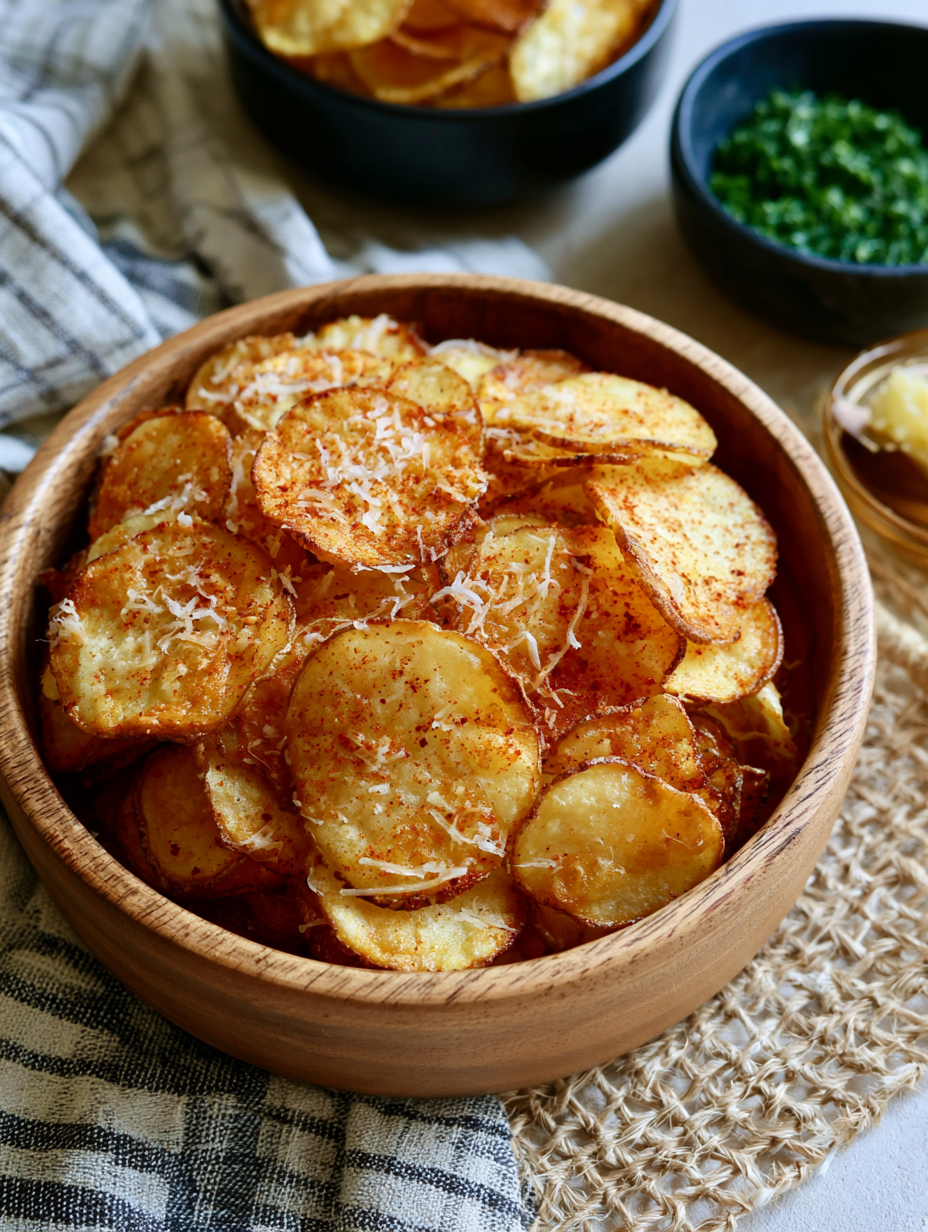
The seasoning — a generous dusting of cheese powder and smoky paprika — transforms these humble fried potato rounds into something genuinely addictive. The cheese brings a savory, umami depth while the paprika adds warmth and a gorgeous brick-red color. Together, they create a chip that is confidently, unapologetically bold.
Follow each step with care, pay attention to the visual and audio cues described along the way, and you will produce a batch of chips that will make you question why you ever reached for the bagged version in the first place.
What You Need
The Ingredients
The beauty of this recipe lies in its simplicity. You need almost nothing — but the quality and preparation of what little you do use matters enormously.
2Medium · ~420gPotatoes
1Teaspoon · For washingSalt
1TablespoonCheese Powder
1TeaspoonPaprika
∞Generous amountCooking Oil
+As neededWater
Choosing the Right Potato
Not all potatoes are created equal for chip-making. Starchy varieties — such as Russet (Idaho) potatoes or Maris Piper — are the gold standard. Their high starch and low moisture content means they fry up drier, crisper, and with a more satisfying crunch than waxy varieties. Avoid new potatoes or salad potatoes entirely; their higher water content works against you at every stage.
If you can, choose potatoes of a similar size — this helps ensure your slices are consistent in thickness and therefore cook at the same rate. Potatoes around 210g each, adding up to about 420g total, is the sweet spot for this recipe.
About the Cheese Powder
Cheese powder — the same type used in boxed macaroni and cheese — is the key to getting that intensely savory, sticky-dry coating that clings to each chip without making it soggy. It is a form of highly processed, dehydrated cheese that has been designed to be dry but still deeply flavorful. You can find it in specialty food stores, online, or you can use the packet from a box of instant mac and cheese. Nutritional yeast is a reasonable substitute if you want a more natural, nuttier version of the cheesy flavor.
The Science
Why Does Blanching Make Chips Crispier?
This is the step that separates a merely good chip from an extraordinary one — and it is rooted in food chemistry.
- Blanching for exactly one minute begins to gelatinize the starch on the outer surface of each slice, forming a thin layer that seals in moisture and creates a sturdier outer structure.
- The rapid heat sets the pectin in the potato cell walls, which helps the chip hold its shape during the full fry without falling apart or becoming greasy and limp.
- Cold-water shocking immediately after blanching halts the cooking process at precisely the right moment — the slices remain translucent, firm, and ready for drying, not soft or mushy.
- Removing surface starch in the washing step prevents the slices from sticking together in the oil and gives the final chip a cleaner, lighter crunch rather than a dense, heavy one.
The Method
Step-by-Step: Building the Perfect Chip
Every step below has been designed with a purpose. Read through all seven before you begin so that nothing catches you off guard. This is a recipe that rewards attention and patience far more than any special equipment.
01
Peel and Slice
Wash the potatoes thoroughly under cold running water, scrubbing the skin to remove any dirt. Peel them completely using a vegetable peeler, making sure to remove any eyes or green patches. Using a mandoline slicer set to its thinnest setting (ideally 1–1.5mm), slice the potatoes into rounds directly into a bowl of cold water. A mandoline is strongly recommended over a knife here — consistency in thickness is critical, because even a fraction of a millimetre difference between slices means some will burn before others are done. If you do not own a mandoline, use the slicing attachment on a box grater, or slice very patiently with a sharp, thin-bladed knife.
🔪 The thinner the slice, the crispier the chip — aim for translucency when you hold a raw slice up to the light.
02
Wash Away the Starch
Once all your slices are in the bowl, add 1 teaspoon of salt and enough cold water to cover everything generously. Use your hands to agitate the slices gently but thoroughly for about 30 seconds. You will immediately notice the water turning white and cloudy — that is excess surface starch being released, and releasing it is essential. This starch, if left on, would cause the chips to clump together in the oil and fry unevenly. It would also make the finished chip denser and harder rather than light and shattering. Drain the slices through a colander and, if you want to go the extra mile, rinse once more under cold running water until the water runs mostly clear.
03
Blanch for Exactly One Minute
Bring a large pot of water to a rolling boil. Drop all the potato slices in at once — do not worry about the water coming back to a boil immediately. Start your timer the moment the slices go in and blanch for exactly 60 seconds, stirring gently once or twice to keep them separated. Precision matters here: under-blanching misses the structural benefit, while over-blanching produces slices that are too soft to handle properly and will not crisp up as beautifully.
⏱ Set a phone timer — do not eyeball this. One minute is one minute.
04
Shock in Cold Water
The moment your timer goes off, use a spider strainer or slotted spoon to transfer the blanched slices immediately into a large bowl of cold water. Stir them around gently to ensure they cool down quickly and evenly. If you want to accelerate the process, you can add a handful of ice cubes. This cold-water bath stops the cooking instantly, locking the slices at the perfect point of partial cooking — their surfaces will be slightly translucent and just starting to feel tender, but the interior will still be firm. Leave them in the cold water for a minute or two until they feel cool to the touch.
05
Dry Completely — This Is Non-Negotiable
Lay two or three layers of paper towels on a clean flat surface — a cutting board works well. Lift the blanched slices out of the cold water one at a time and arrange them in a single layer on the paper towels, making sure they do not overlap. Then lay another layer of paper towels on top and press down gently but firmly all over. This step cannot be rushed or skimped on. Any water remaining on the surface of the slices will cause the hot oil to violently splatter when you add them, and — more critically — will prevent proper crisping. Water and hot oil do not fry; they steam. Steamed chips are soggy chips. Take your time here and press out every last drop of moisture you can. The slices should look almost dry and slightly leathery before they go into the oil.
💧 Pat, don’t rub — rubbing can break the delicate blanched slices apart.
06
Fry Low and Slow to Perfection
Pour a generous depth of neutral cooking oil — sunflower, vegetable, or canola all work well — into a wide, heavy-bottomed pan. You want at least 2–3cm of oil depth so the chips can float and cook on both sides simultaneously. Heat the oil over medium heat until small, steady bubbles appear when you dip a wooden chopstick or the handle of a wooden spoon into it. This should be around 160–170°C (325–340°F) if you have a thermometer, though the visual cue is reliable enough. Carefully lower the potato slices into the oil one by one to avoid splashing. Fry for around 5 minutes, stirring gently and occasionally with chopsticks or long tongs to ensure even cooking. Do not rush this with higher heat — a moderate temperature allows the moisture inside each slice to evaporate gradually, which is what creates the deep, thorough crispness rather than a browned exterior with a soft center. Remove individual chips as they are ready: the bubbling around each chip will slow dramatically and the sizzling sound will quiet down when the moisture is fully gone. That is your signal. Drain them on a fresh layer of paper towels.
🔥 Never rush the fry with high heat — patience now means maximum crunch later.
07
Season While Hot
Transfer the hot, drained chips immediately into a large, deep mixing bowl. Speed matters here — the residual heat on the surface of each chip will help the seasoning powder cling and adhere, creating a more complete and even coating. Sprinkle 1 tablespoon of cheese powder and 1 teaspoon of paprika over the chips. Now, rather than stirring with a spoon (which can break the chips), grip the bowl firmly with both hands and toss it with a circular, scooping motion — shaking and rolling the chips so the seasoning distributes itself evenly. Taste one and adjust if needed. Serve immediately.
🧀 Season hot — the warmth of the chips opens up the coating and makes the flavor bloom.
“The moment when the bubbling slows and the sizzle quiets — that is your chip telling you it is ready. Learn to listen to your pan.”The Sound of a Perfect Fry
Pro Knowledge
Tips, Tricks, and Common Mistakes
Even the best recipe can fall apart if a few critical details are missed. Here are the most common pitfalls and how to sidestep them with confidence.
🥔
Potato Choice
Always use starchy potatoes. Waxy varieties contain too much water and produce a soft, greasy chip no matter how carefully you follow the other steps.
📏
Slice Uniformity
Uneven slices mean uneven cooking. Thick slices take longer and may still be soft when the thinner ones are burning. A mandoline is worth every penny.
💦
Drying is Everything
This is the single most commonly skipped step and the single most common cause of soft, soggy chips. Dry the slices as if your life depends on it.
🌡️
Oil Temperature
Oil that is too hot burns the outside before the inside dries out. Too cool and the chips absorb oil and become greasy. Medium heat is the sweet spot.
🔊
Listen to the Sizzle
A loud, aggressive sizzle means the chip is still releasing moisture. When the sound drops to a gentle whisper, the chip is ready to come out of the oil.
⚡
Season Immediately
Seasoning sticks to hot oil. Wait until chips cool and the powder sits on top rather than bonding to the surface — season straight from the pan.
At a Glance
Approximate Nutritional Profile
The nutritional content of homemade chips varies based on how much oil is absorbed during frying. Because these chips are fried at a consistent medium temperature and drained well on paper towels, oil absorption is relatively controlled. Here is an approximate breakdown for the full batch, serving 2–3 people.
~320Calories / serving
4gProtein
38gCarbohydrates
17gTotal Fat
420gPotatoes used
Compared to many commercial chips, homemade chips made with this technique tend to be lower in sodium (you control the salt entirely) and free from artificial preservatives, stabilizers, and flavor enhancers. The cheese powder adds a small amount of additional sodium, but the overall profile remains more wholesome than most bags off the shelf.
Explore Further
Seasoning Variations to Try Next Time
Once you have mastered the base technique, the seasoning possibilities are essentially limitless. The method stays exactly the same — only the final dusting changes. Here are four flavor directions worth exploring.
Salt & Vinegar
Dust with fine sea salt and a pinch of citric acid powder. Finish with a light spray of white wine vinegar directly on the hot chips for an acidic punch.
Spicy Chili Lime
Mix chili powder, cayenne, zest of one lime, and a pinch of sugar. The heat builds slowly and the lime lifts everything with brightness.
Garlic Herb
Combine garlic powder, dried rosemary, dried thyme, and sea salt. Earthy, aromatic, and deeply savory — pairs beautifully with a cold yogurt dip.
Barbecue Smoke
Smoked paprika, onion powder, brown sugar, cumin, and a touch of cayenne. Bold, sweet, and smoky — the closest thing to a slow-cooked rib in chip form.
Storing Your Chips (If They Survive)
Homemade chips are best eaten within minutes of frying and seasoning — that is when the crunch is at its absolute peak. However, if you somehow have leftovers, allow them to cool completely to room temperature before storing in an airtight container or zip-lock bag. Press out as much air as possible before sealing. They will keep at room temperature for up to 2 days, though they will gradually soften as they reabsorb ambient humidity. To partially revive them, spread on a baking sheet and heat in a 180°C (350°F) oven for 5–7 minutes. They will not be quite as good as fresh, but they will be close.
✦ ✦ ✦
Final Thoughts
More Than Just a Snack
There is something quietly profound about making your own chips from scratch. It is a reminder that many of the things we reach for in wrappers and packets — things we treat as convenience foods, as background eating, as unremarkable — can be genuinely extraordinary when made by hand with care and attention.
This recipe is not difficult. It does not require expensive equipment or rare ingredients. What it requires is patience in the drying step, precision in the blanching, and attentiveness to the sound of the frying pan. Master these three things, and you will make chips that are consistently, reliably, properly crispy — the kind of crispy that makes a sound when you bite down, the kind that leaves a faint golden shimmer on your fingertips, the kind you keep reaching back for one more of.
The cheese and paprika seasoning is bold and unsubtle, and that is entirely the point. These are not delicate nibbles designed to accompany a glass of wine at a dinner party (though they certainly can be). These are chips designed to be eaten with both hands, straight from the bowl, while they are still warm. They are designed to be exactly what a chip should be: honest, deeply flavorful, and completely, gloriously crispy.
Go make them. You will not regret it.
Now Go Make Them.
Two potatoes, seven steps, and one bowl of the crispiest chips you have ever made at home.