Oh my goodness, Halloween is right around the corner, and I can’t contain my excitement! It’s that magical time of year when we can let our imaginations run wild and create all sorts of fun and spooky treats. I absolutely love whipping up these *Halloween desserts for kids*—they not only bring a big smile to little faces but also add an extra sprinkle of joy to our celebrations. From the moment the first pumpkin decorations hit the stores, I start dreaming about the delicious goodies we can make together!
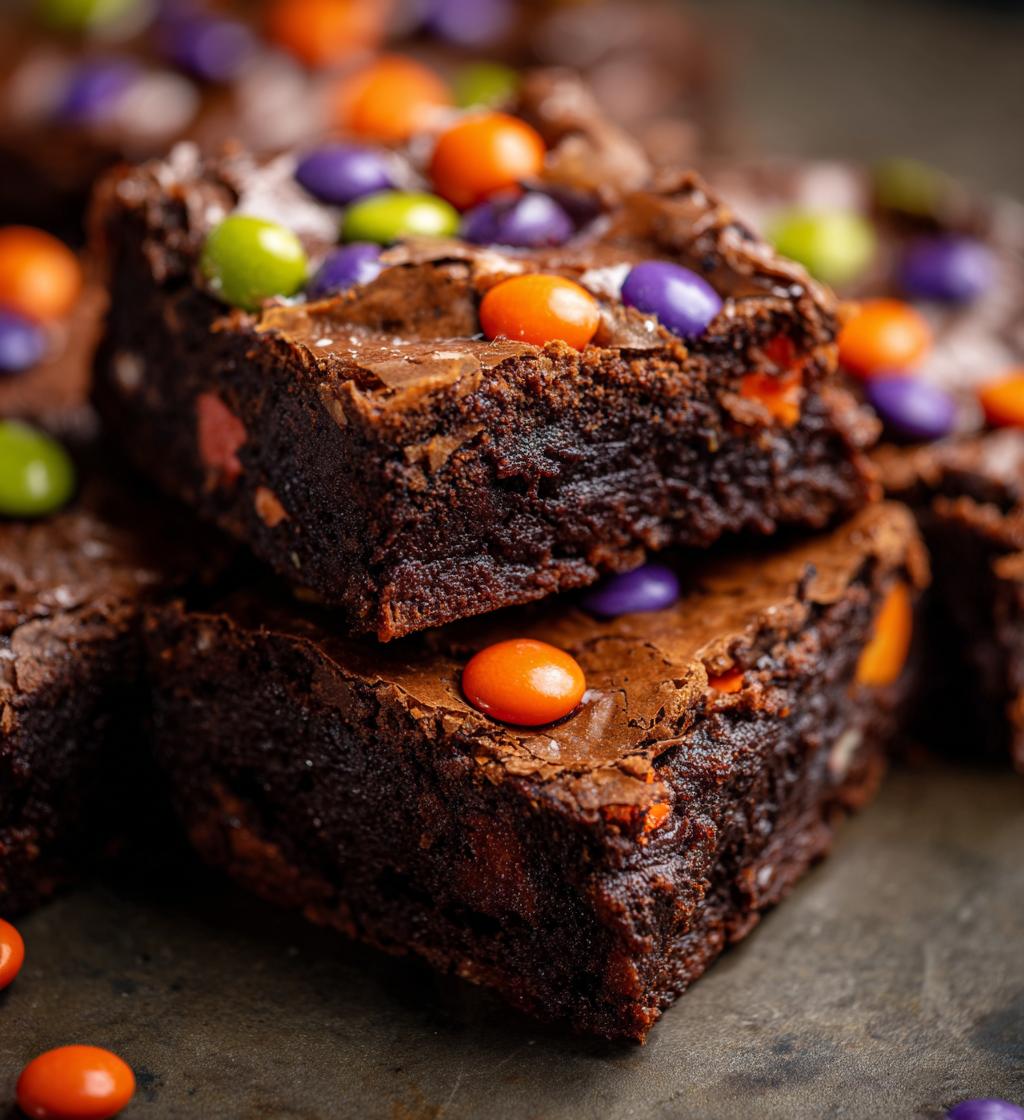
Imagine the thrill on your kids’ faces when they bite into a gooey, chocolatey treat decorated with colorful candies and spooky designs. These desserts are perfect for Halloween parties, class treats, or just a cozy family night in. Plus, they’re super easy and quick to prepare, so you can spend more time enjoying the festivities. Trust me, your kitchen will be filled with laughter, creativity, and that sweet chocolate smell that makes everything feel festive. Let’s dive into making these delightful treats that will surely make this Halloween unforgettable!
Ingredients List
Gathering the right ingredients is the first step toward creating these delightful Halloween desserts for kids! Here’s what you’ll need to whip up this spooky treat:
- 1 cup all-purpose flour: This will provide the foundation for our delicious dessert, giving it that perfect structure.
- 1/2 cup cocoa powder: This adds a rich chocolate flavor that makes every bite heavenly. Trust me, you can’t go wrong with chocolate!
- 1 cup sugar: The sweet magic that binds everything together. It balances the cocoa and gives our dessert that irresistible sweetness.
- 1/2 cup butter: Make sure it’s softened! This will help create that gooey, melt-in-your-mouth texture we all love.
- 2 eggs: They act as a binding agent, helping everything hold together while adding moisture and richness.
- 1 teaspoon vanilla extract: A splash of vanilla adds warmth and depth to the flavor. It’s like a hug for your taste buds!
- 1 teaspoon baking powder: This little powerhouse helps the dessert rise and stay fluffy, making every bite delightful.
- 1/2 teaspoon salt: Just a pinch enhances the sweetness and balances the flavors; it’s a crucial step you don’t want to skip.
- 1 cup chocolate chips: Because more chocolate is always a good idea! These melt beautifully and add pockets of gooey goodness.
- Decorative candies for topping: Get creative here! Use any fun Halloween-themed candies to make your desserts look festive and spooky!
With these ingredients, you’re all set to create a fun and delicious treat that kids will absolutely love. Let’s keep the excitement rolling—on to the next step!
How to Prepare Instructions
Alright, let’s get into the fun part! Making these Halloween desserts for kids is super easy and quick. Just follow these simple steps, and you’ll have a delicious treat in no time!
- Preheat your oven: First things first, set your oven to 350°F (175°C) so it’s nice and hot when your batter is ready to go. This step is crucial for helping your dessert bake evenly!
- Mix the dry ingredients: In a medium bowl, combine the all-purpose flour, cocoa powder, baking powder, and salt. Give it a good whisk to ensure everything is evenly mixed. This helps avoid any surprises later!
- Cream the butter and sugar: In another bowl, beat the softened butter and sugar together until the mixture is smooth and fluffy. This should take about 2-3 minutes. You’ll know you’re there when it looks light and creamy—like a soft cloud!
- Add the eggs and vanilla: Crack in the eggs and pour in the vanilla extract. Mix until everything is well combined. It should smell amazing right about now—don’t you just love vanilla?
- Combine the mixtures: Gradually add your dry ingredients to the wet mixture, stirring gently until just combined. Make sure not to overmix; a few lumps are totally fine! We want that tender texture, after all.
- Fold in the chocolate chips: Now, it’s time for the best part! Gently fold in the chocolate chips, making sure they’re evenly distributed throughout the batter. Wow, can you smell the chocolate goodness?
- Pour into the pan: Grease your baking pan (I like to use a 9×9 inch square pan) and pour your batter in, spreading it out evenly. You can do this with a spatula—just make sure it looks nice and even.
- Bake: Pop your pan into the preheated oven and bake for about 25-30 minutes. To check for doneness, insert a toothpick into the center. If it comes out clean or with just a few moist crumbs, you’re golden!
- Cool and decorate: Once baked, remove the pan from the oven and let it cool for a bit. After about 10 minutes, transfer the dessert to a wire rack to cool completely. Once it’s cool, it’s time to unleash your creativity! Decorate with your favorite Halloween-themed candies and make it look spooky!
And there you have it! Follow these steps, and you’ll be on your way to creating the most delightful Halloween treats that your kids will absolutely adore. Now, let’s get ready to enjoy those delicious bites!
Why You’ll Love This Recipe
This Halloween dessert recipe is not just about the treats; it’s about the joy and fun it brings to your kitchen! Here’s why you’ll adore whipping these up:
- Quick Preparation: With just 15 minutes of prep time, you can get these spooky delights into the oven in no time, leaving you more moments to enjoy the festivities with your family!
- Kid-Friendly: Simple enough for kids to help out! They’ll love mixing, decorating, and of course, indulging in their creations.
- Fun Decorations: Unleash your creativity with Halloween-themed candies! From googly eyes to gummy worms, the decorating possibilities are endless and so much fun!
- Delicious Taste: Rich, chocolatey goodness with a gooey texture that melts in your mouth. Trust me, every bite is a treat that’ll have everyone coming back for more!
- Perfect for Any Occasion: Whether it’s a Halloween party, classroom treat, or a cozy family gathering, these desserts are sure to impress and spread smiles!
Get ready for some spooktacular fun in the kitchen! I promise, these treats will make your Halloween celebrations extra special.
Tips for Success
To ensure your Halloween desserts for kids turn out perfectly, I’ve gathered some tried-and-true tips that will make your baking experience a breeze. Let’s make sure these treats are as delicious as they are fun!
- Test for doneness: When you think your dessert is ready, do the toothpick test! Insert a toothpick into the center of the pan; if it comes out clean or with a few moist crumbs, you’re good to go! If it’s still wet, give it a few more minutes in the oven.
- Don’t overmix the batter: Once you combine the dry and wet ingredients, mix gently. Overmixing can lead to a tougher texture, and we want that delightful softness that melts in your mouth!
- Get creative with decorations: Use a variety of Halloween-themed candies to top your treats. Think gummy worms, candy corn, or even little chocolate bats! Let your kids help—they’ll love getting involved in the spooky fun.
- Make it festive: For an extra spooky touch, consider using edible glitter or colored sprinkles to give your desserts a magical Halloween glow! Just a sprinkle here and there can take your treats to the next level.
- Chill before decorating: If you find the dessert a bit too warm to decorate, pop it in the fridge for a few minutes. This will help the chocolate chips set a bit and make it easier to add your fun toppings without them melting away.
With these tips, you’re all set for success! I can’t wait for you to dive into this delicious adventure and create some unforgettable treats. Happy baking!
Variations
One of the best parts about these Halloween desserts for kids is how versatile they are! You can easily mix things up to create a new twist on this already delicious recipe. Here are some fun variations to try, all while keeping that spooky spirit alive:
- Different Types of Chocolate: Swap out the regular chocolate chips for white chocolate, milk chocolate, or even dark chocolate for a richer flavor. You could also mix different types together for a fun, colorful effect!
- Add Seasonal Spices: Want to bring in some fall flavors? Try adding a teaspoon of cinnamon or pumpkin spice to the dry ingredients. It’ll give your treats a warming, cozy flavor that screams autumn!
- Nutty Goodness: If your kids love a little crunch, consider folding in some chopped nuts like walnuts or pecans. Just be sure to check for allergies first. They add a delightful texture contrast to the soft, chocolatey cake!
- Fruit Fun: Mix in some festive dried fruits like cranberries or chopped apples for added sweetness and a pop of flavor. They’ll complement the chocolate beautifully and add a nice chewiness!
- Halloween-Themed Add-ins: Get creative with add-ins like crushed Oreos for a cookies-and-cream twist or mini marshmallows for a gooey surprise. You can even sprinkle in some candy corn for that classic Halloween vibe!
These variations not only keep things exciting but also allow you to cater to different tastes. So go ahead, get adventurous, and let your imagination run wild in the kitchen this Halloween! Your little ghouls and goblins will love whatever spooky creation you come up with!
Serving Suggestions
Now that you’ve whipped up these delightful Halloween desserts for kids, it’s time to think about how to serve them! Pairing these treats with the right dishes or drinks can elevate your spooky festivities even further. Here are some fun serving suggestions to make your Halloween gathering extra special:
- Spooky Punch: Create a festive Halloween-themed punch using fruit juices and soda. Add some floating gummy worms or eyeball-shaped candies for a fun twist. Trust me, the kids will love it!
- Halloween Fruit Platter: Serve a colorful platter of seasonal fruits like oranges, apples, and grapes. You can even carve out a pumpkin and fill it with fruit salad for a fun presentation!
- Candy Corn Milkshake: Blend up some vanilla ice cream with a splash of milk and layers of candy corn for a sweet shake that matches your desserts perfectly. It’s a treat that kids will go crazy for!
- Ghostly Hot Chocolate: Serve up some hot cocoa topped with whipped cream and mini marshmallows. You can even add a sprinkle of cocoa powder or chocolate shavings to create a ‘ghostly’ effect on top!
- Decorative Plates: Use Halloween-themed plates or napkins to serve your desserts. It adds a fun touch and makes everything feel more festive! You can find plates with ghosts, pumpkins, or spiders to really set the mood.
By pairing these Halloween desserts with fun drinks and creative presentations, you’ll create a delightful atmosphere that the kids will remember for years to come. Let’s make this Halloween a spooktacular celebration filled with laughter and delicious treats!
Storage & Reheating Instructions
Now that you’ve created these delicious Halloween desserts for kids, you might be wondering how to properly store any leftovers (if there are any!). Here’s how to keep those spooky treats fresh and tasty:
- Storing Leftovers: Allow your delicious brownies to cool completely before storing. Once they’re cool, cut them into squares and place them in an airtight container. This will keep them moist and prevent them from drying out. You can also layer them with parchment paper to avoid sticking!
- Refrigeration: If you live in a warm area or want to keep them extra fresh, feel free to store the container in the fridge. Just be sure to bring them back to room temperature before serving, as they taste best that way!
- Freezing for Later: Want to save some treats for later? You can freeze the brownies! Wrap each piece tightly in plastic wrap and then place them in a freezer-safe container. They’ll last for about 2-3 months. When you’re ready to enjoy, simply thaw them in the fridge overnight.
As for reheating, if you prefer them warm (who wouldn’t?), just pop them in the microwave for about 10-15 seconds. This will give you that gooey, melty chocolate experience again. Just be careful not to overheat them; nobody likes a dry treat!
With these storage and reheating tips, you’ll ensure every bite of your Halloween desserts is as delicious as the first. Happy snacking!
Nutritional Information Section
Curious about what’s in these delightful Halloween desserts for kids? Here’s the estimated nutritional breakdown per serving (that’s 1 piece of the deliciously spooky treat!):
- Calories: 180
- Fat: 8g
- Saturated Fat: 5g
- Unsaturated Fat: 2g
- Trans Fat: 0g
- Cholesterol: 30mg
- Sodium: 150mg
- Carbohydrates: 24g
- Fiber: 2g
- Protein: 3g
- Sugar: 15g
Keep in mind that these values are estimates and can vary based on the specific brands of ingredients you use and any fun variations you might add. It’s always great to have a little knowledge about what we’re munching on, especially when it comes to making treats for our little ones!
FAQ Section
Got questions about these Halloween desserts for kids? Don’t worry, I’ve got you covered! Here are some common queries that might pop up as you whip up these spooky treats:
- Can I substitute the all-purpose flour? Absolutely! If you’re looking for a gluten-free option, feel free to use a gluten-free all-purpose flour blend. Just check that it includes xanthan gum for the best results!
- What if I don’t have cocoa powder? No problem! You can swap it for carob powder if you want a different flavor profile. Just keep in mind it will change the taste a bit, but still delicious!
- Can I use less sugar? Yes! If you want to cut back on sugar, you can reduce the amount by about 1/4 cup. Just remember, it might affect the overall sweetness and texture slightly, but it should still turn out great!
- What kind of decorative candies should I use? Get creative! Use anything from gummy worms, candy eyes, or even chocolate-covered pretzels for a spooky touch. The more colorful and fun, the better!
- How do I store leftovers? Once cooled, cut your treats into squares and place them in an airtight container. They can stay fresh at room temperature for a few days, or you can refrigerate them to keep them extra moist!
- Can I freeze these desserts? Yes! These treats freeze beautifully. Just wrap each square tightly in plastic wrap and place them in a freezer-safe container. They’ll last about 2-3 months, and you can thaw them in the fridge overnight when you’re ready to enjoy!
- What can I do if the dessert turns out too dry? If you find your treats are a bit too dry, try adding a dollop of whipped cream or a scoop of ice cream on top when serving. It’ll add moisture and make it even more delicious!
If you have any other questions or need more tips, feel free to reach out! I’m here to help you create the most amazing Halloween desserts that your kids will love!
Print
Halloween Desserts for Kids: 7 Spooky Treats to Love
- Total Time: 45 minutes
- Yield: 12 servings 1x
- Diet: Vegetarian
Description
Fun and spooky desserts for kids to celebrate Halloween.
Ingredients
- 1 cup all-purpose flour
- 1/2 cup cocoa powder
- 1 cup sugar
- 1/2 cup butter
- 2 eggs
- 1 teaspoon vanilla extract
- 1 teaspoon baking powder
- 1/2 teaspoon salt
- 1 cup chocolate chips
- Decorative candies for topping
Instructions
- Preheat your oven to 350°F (175°C).
- In a bowl, mix flour, cocoa powder, baking powder, and salt.
- In another bowl, cream butter and sugar together until smooth.
- Add eggs and vanilla to the butter mixture and mix well.
- Gradually add the dry ingredients to the wet mixture and mix until combined.
- Fold in chocolate chips.
- Pour the batter into a greased baking pan.
- Bake for 25-30 minutes or until a toothpick comes out clean.
- Let cool and decorate with candies.
Notes
- Use Halloween-themed candies for decoration.
- Store leftovers in an airtight container.
- Feel free to add nuts or other mix-ins.
- Prep Time: 15 minutes
- Cook Time: 30 minutes
- Category: Dessert
- Method: Baking
- Cuisine: American
Nutrition
- Serving Size: 1 piece
- Calories: 180
- Sugar: 15g
- Sodium: 150mg
- Fat: 8g
- Saturated Fat: 5g
- Unsaturated Fat: 2g
- Trans Fat: 0g
- Carbohydrates: 24g
- Fiber: 2g
- Protein: 3g
- Cholesterol: 30mg
Keywords: halloween desserts for kids